How to Convert A Shuttle Bus into an RV or Campervan - A List of Steps

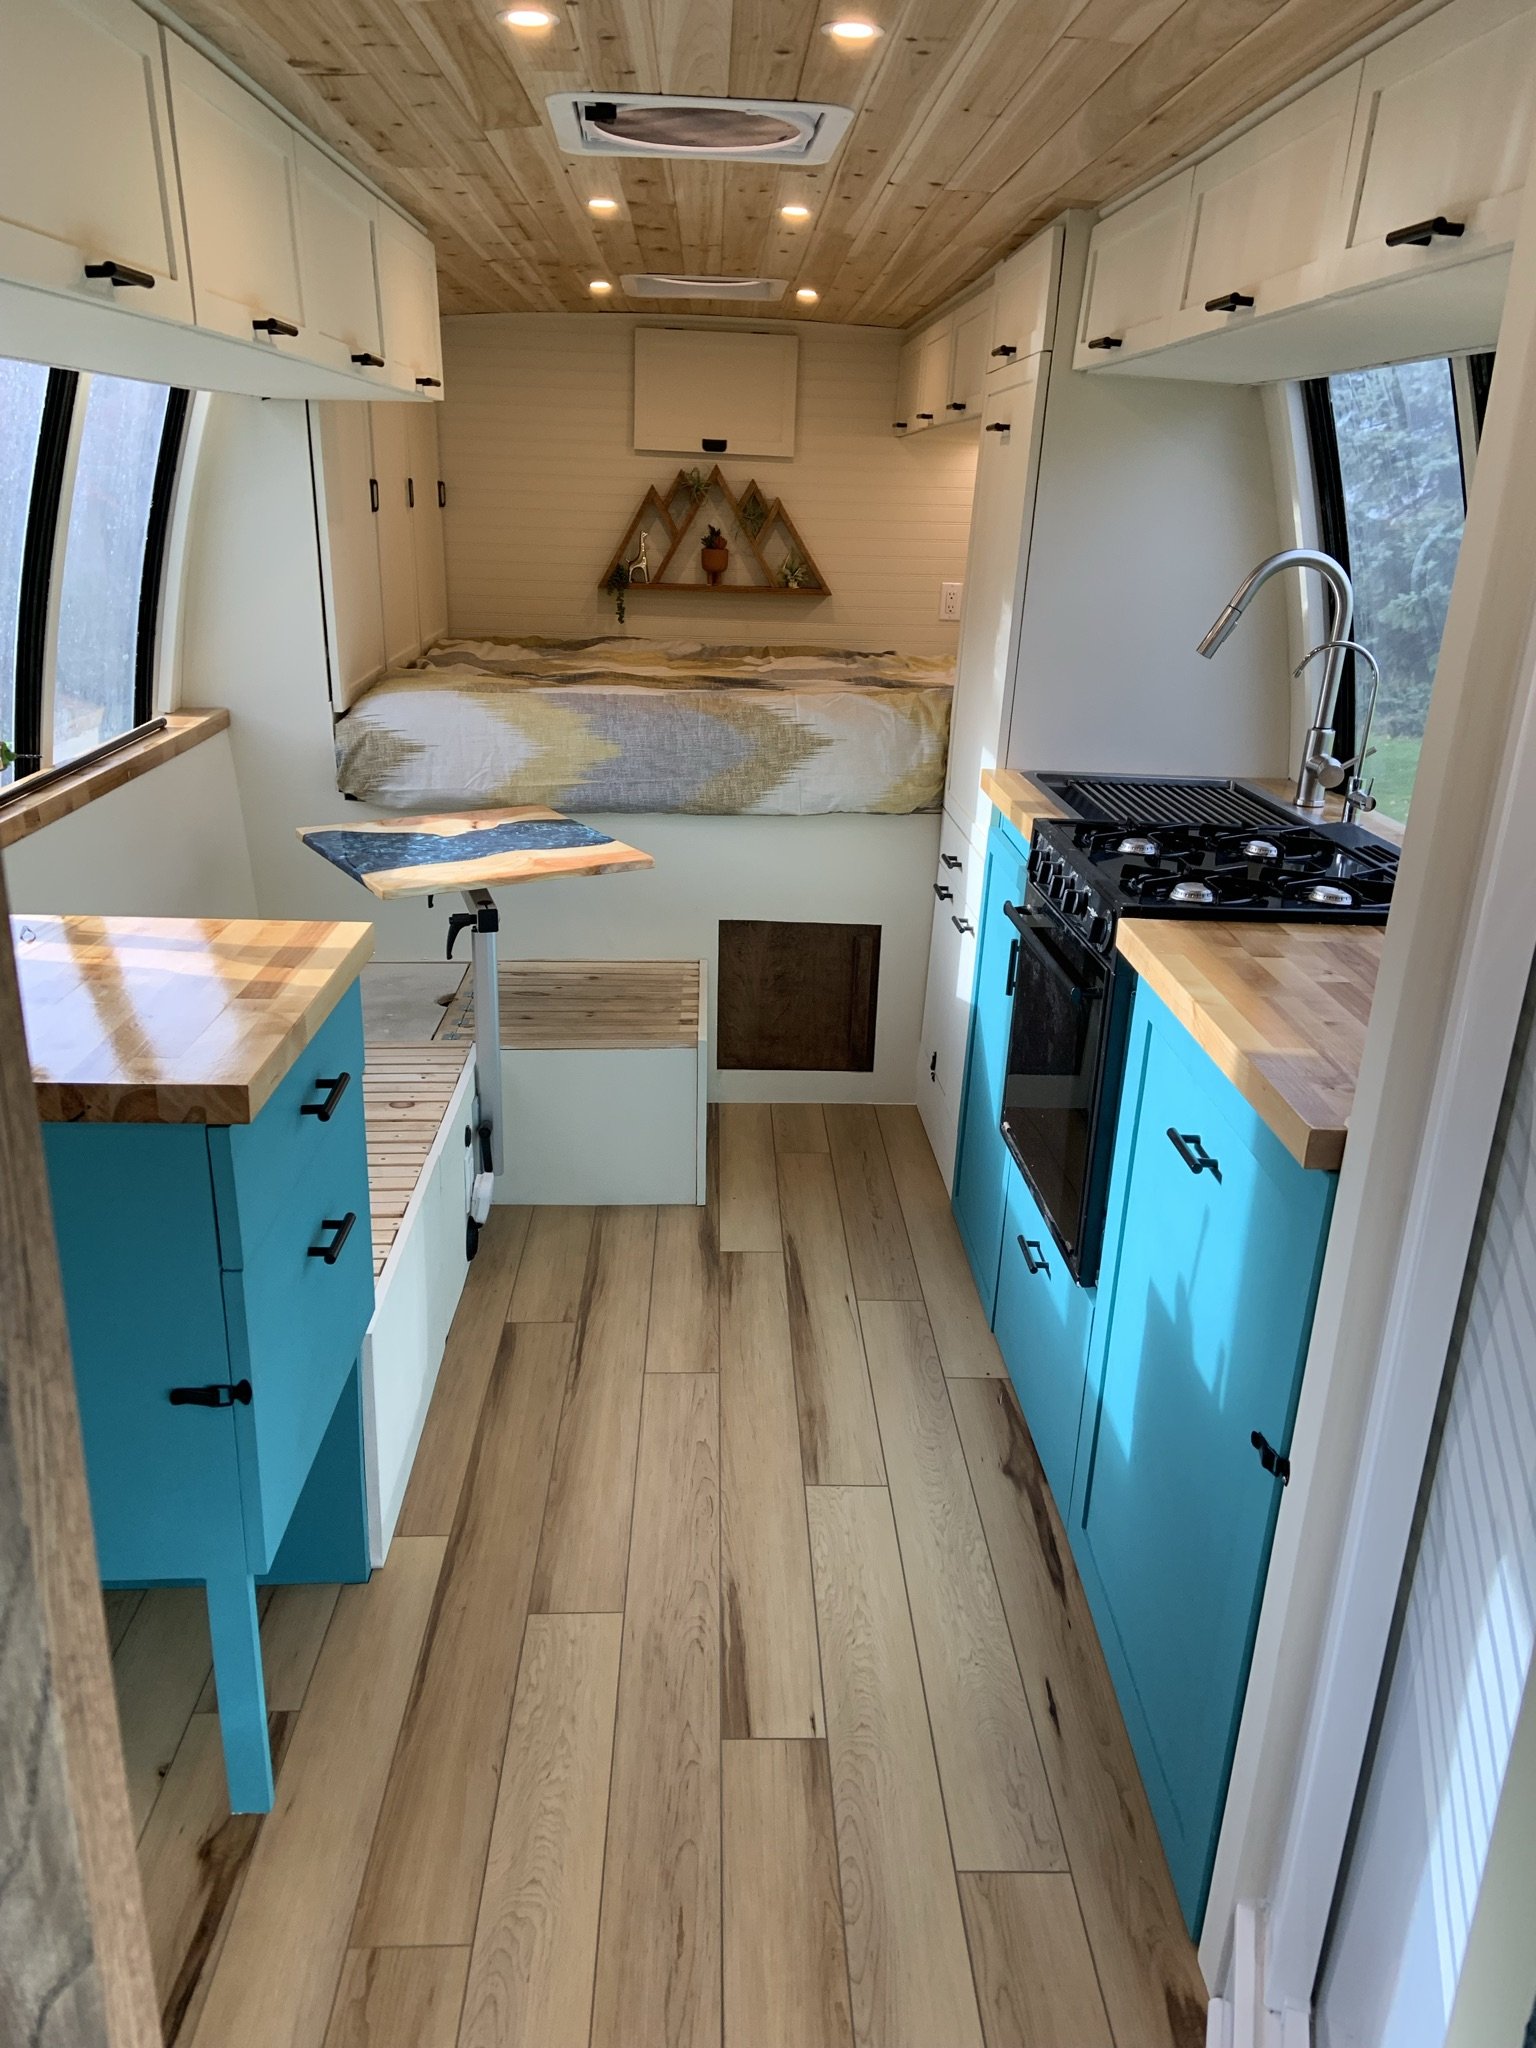
The before and after of the front half of our bus.
Our conversion took us eight months and probably 2,000 hours of labor to complete. A serious, in-depth conversion is not a simple process by any means. When we started our build, I looked around online for an outline on how best to dive into this project, and I came up with absolutely nothing of value - namely a single page article from a bus dealer urging me to hire a professional, and an Instructable from a Canadian family who did an extremely specific, bare bones conversion that was nothing like what I wanted.
So here’s what we did (you can take a look at our bus tour to see the end result of this process). We’ve made many friends in the van and bus living communities, and know for a fact that the way we went about these things is not dissimilar from how many other seasoned builders do as well.
****Don’t take this as a completely comprehensive guide to your needs.**** Every bus, every conversion, every lifestyle eventually lived in every bus is going to be different. You may be planning to leave your ceiling alone, or use a solar generator, or have a completely different layout planned that requires a different order of operations. That’s great! Keep that in mind as you read this guide and know that you can (and should) see what we did and adjust to suit your own specifications. That said, if you’re doing an in-depth build like ours do know that this does cover most of the major systems and projects you’ll be encountering during your build.
Step 1: Find a shuttle bus. Here’s an entirely separate article about that.
Step 2: Register as a Motorhome & Insure (More info coming soon)
Step 2.5: Address Mechanical Issues
I’d personally recommend tackling any large mechanical projects first before you start into the conversion itself. At the very least, take your bus to a trusted mechanic and let them give it a once-over - and take the advice they give you. A conversion is absolutely useless if your bus doesn’t run. I’ve seen many sad stories of people pouring their heart and soul into building out a bus only to have an unknown mechanical problem rear its ugly head on their maiden voyage and ruin everything. Please, PLEASE make sure your bus is solid before you start spending money on making it a home.
Step 3: Demolition
Once your bus is legally yours, mechanically sound, and parked at the location you’ll be completing the conversion at, demolition of the interior is the first real step in the conversion.
Your bus likely came with seats - take them all out. If you’re keeping some for passengers, pick the best ones and take the rest to the curb (some people try to sell them, and more power to you if you can, but frankly very few people are looking to pay much of anything for used bus seats).
Remove all the interior floor, wall, and ceiling coverings. Ours were riveted into place, but many are glued and require a pry bar.
Take out anything else that remains that you don’t plan on using in your final build. We had interior lights and speakers we wanted to get rid of, as well as bars on the windows and the block heater in the back of the bus. We kept the rear AC unit, and all of the bus’s factory insulation (We left the factory insulation and added our own insulation on top for 2x the insulation). Everything and anything else was disposed of. At the end of the demo, if you’re doing an in-depth build your shuttle bus should look roughly like the picture below.
Wheelchair lifts: we purposely bought a bus without one, because they’re historically not fun work with. At the risk of already sounding like a broken record - every bus is different, and wheelchair lifts can also be installed and wired differently to the engine electronics. Some use an auxiliary battery, some people accidentally decommission their own bus when pulling out important wiring from the lift itself. The job is a pain, and I’m sorry I don’t have an easy fix for you. I’m hoping to speak to a few individuals who have done these removals down the road so that I can offer you some more insight, but for now I have to direct you to Google for more help with that. But - this would of course be the phase you’d want to remove it should you have one.
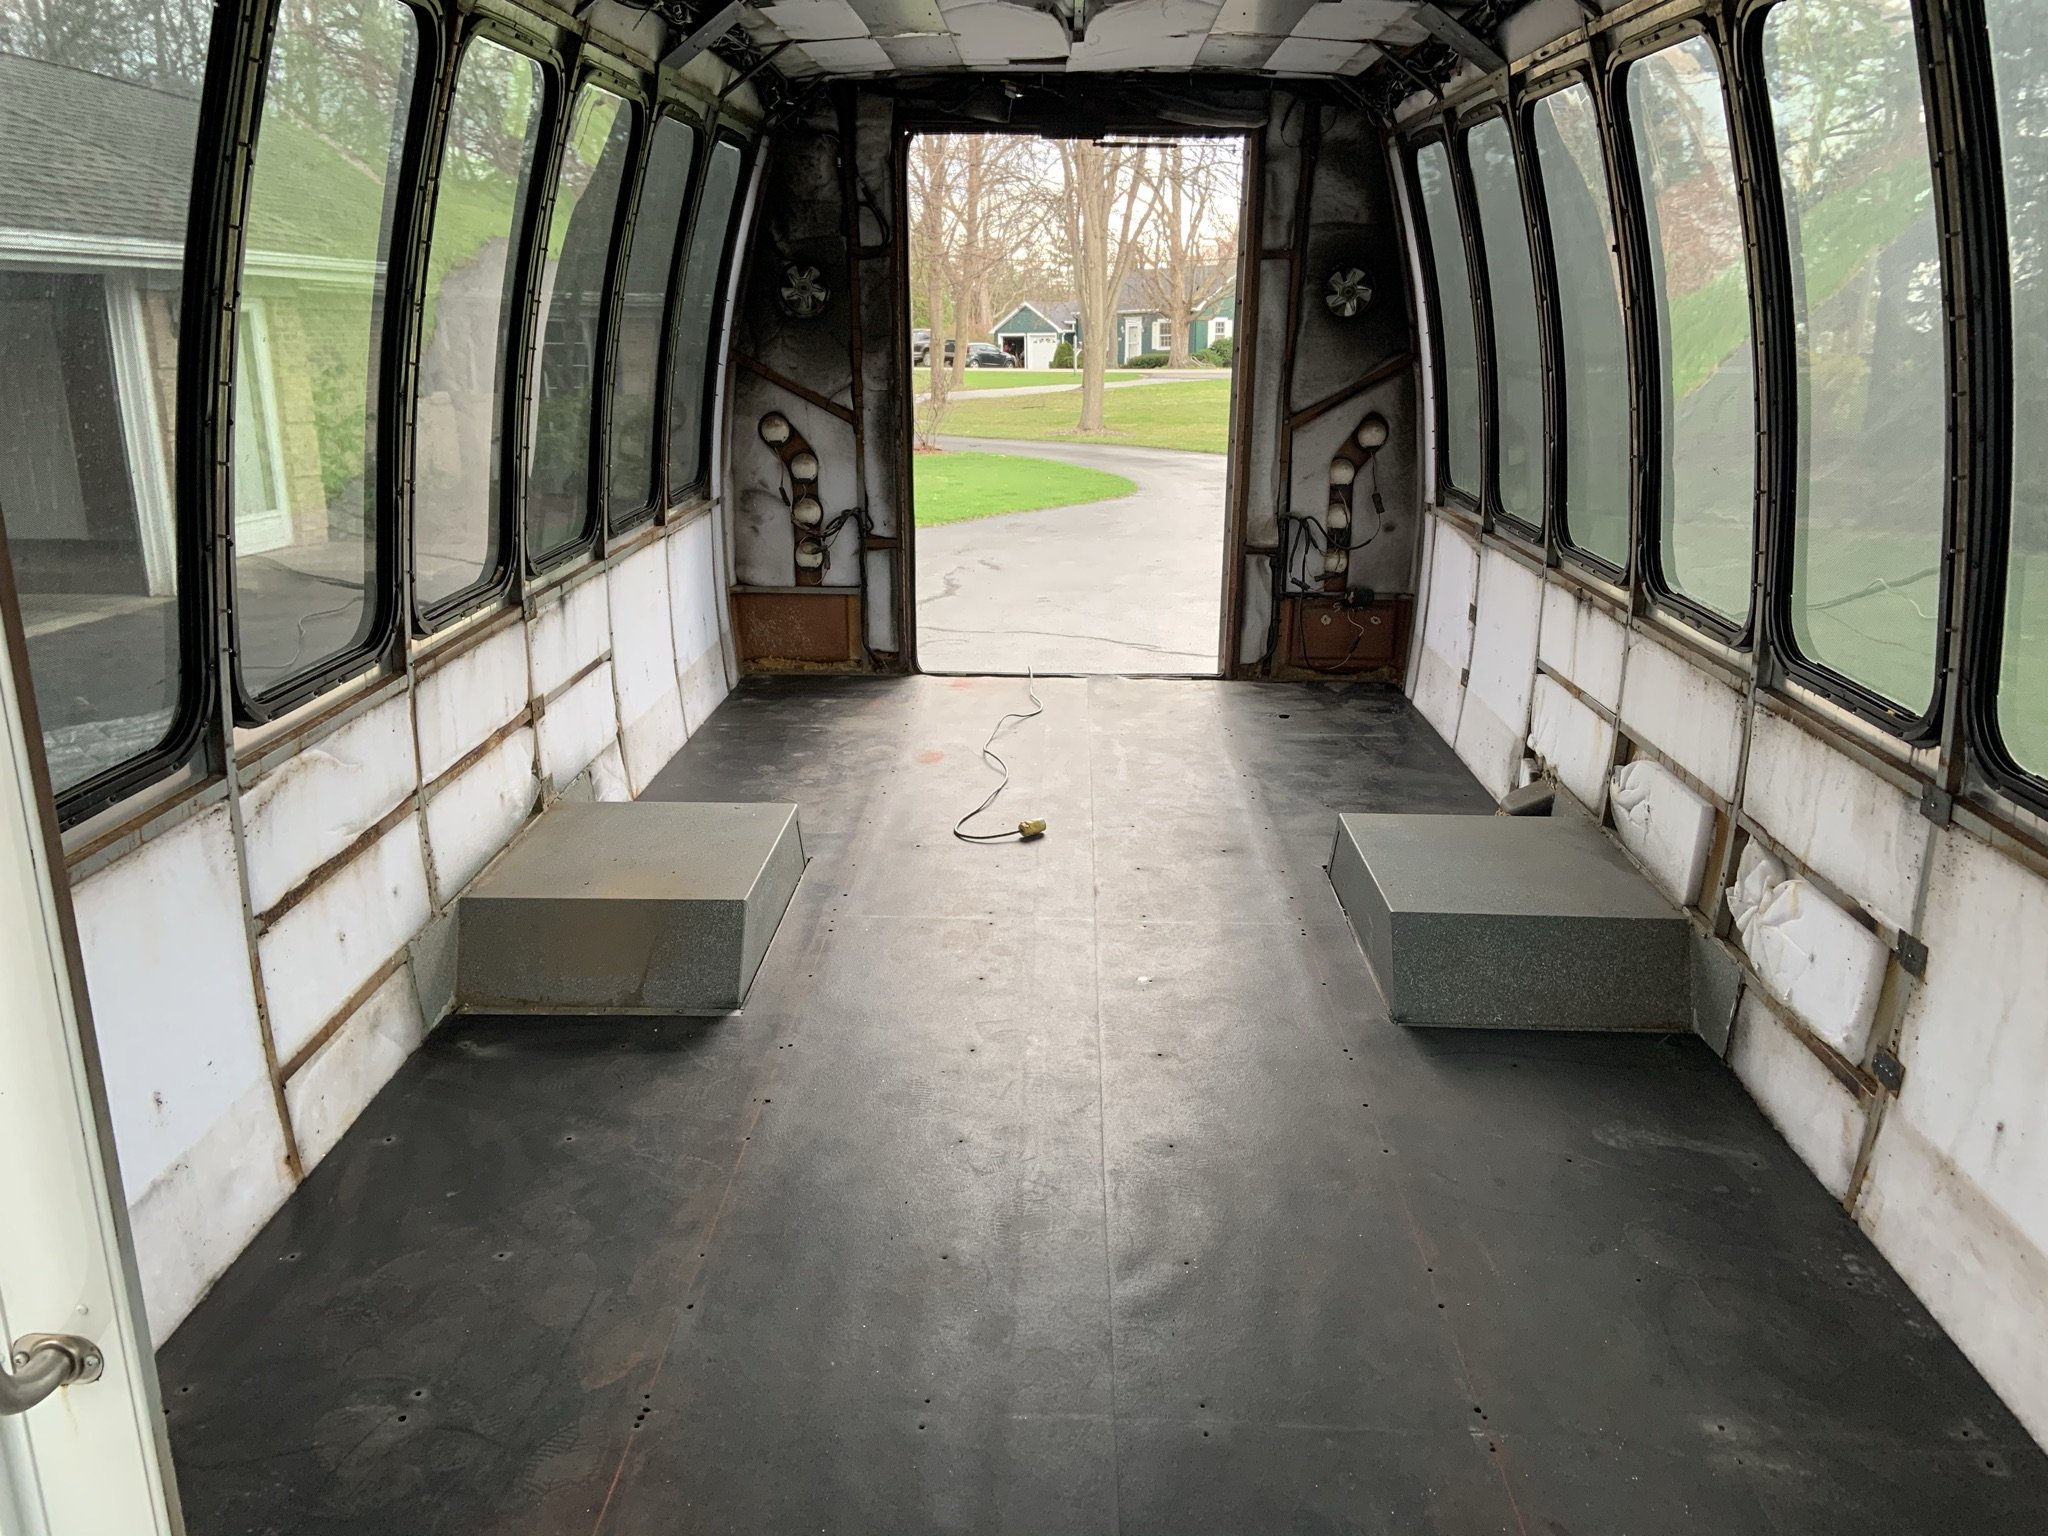
We discovered this rubber mat on top of our subfloor that we kept for added insulation, but in most cases you should be looking at the wood subfloor here.
Step 4: Address Any Structural Concerns
Don’t start putting anything in your bus until the structure is solid. After everything that needs to come out is out, take stock of what’s left. How is your bus subfloor? They’re often plywood - does yours have water damage or visible holes? Replace it. If you have metal supports, are they rusty? Is it surface rust or structurally problematic? Replace them if they don’t look good.
In short - fix these issues before they become massive, build-destroying problems. Better safe than sorry.
This can also be a good time to paint any exposed metal inside your bus with a rust-preventing paint to stop future problems before they start.
Step 5: Seal Your Windows
You will be tempted to skip this step because it sucks - trust me, you shouldn’t. Get a friend and a garden hose and spray your windows one at a time from the outside. Have someone on the inside of the bus checking around the perimeter of each window for the presence of water. I’ve yet to see someone do this and find that all of their windows are perfect, even in buses less than five years old. And regardless of how many leaks you find, I’d recommend resealing every window you have. The last thing you want to do is damage the brand new walls and furniture you’re about to build with a window leak.
Windows, like everything, vary by bus, but here’s some general advice. Don’t take out all your windows at once - work on them one at a time. The shell of your bus is more flexible than you realize, and if you pull out all your windows, things will likely shift, and it will NOT be easy to put them back in.
The sealing process is not complicated, but it is a bit tedious (we have 14 windows, so it was especially time consuming). Essentially, what you want to do is remove each window from the bus, scrape off any old sealant that is present on both the bus and the window frame, remove the old weather seal (if present), and replace both of those things before reinstalling the window in the bus. We used butyl tape and regular old weather-stripping from Home Depot in the correct size, and our windows have been leak-free since.
Pro tip: get off as much old caulk and sealant off your windows as possible before adding anything new. Use Goo Gone & a heat gun if necessary. Any excess old material creates gaps, which creates entry points for water.
On skinning windows: We opted not to do this because we like the exterior look with the original bus windows for stealth. But you do have the option at this point to remove as many windows as you want and replace them with sheet metal (and install different windows within that sheet metal, if you prefer). Benefits include being able to choose exactly where and how many windows you have, reducing possible entry points for leaking water, and increased room for insulation. The downsides: this is a pretty big undertaking, and unless you like the look of exposed metal on your bus exterior, you’re going to need to paint it.
Step 6: Choosing Insulation
This is one of the most hotly debated topics in the vehicle conversion community, believe it or not. I have plans to write out an explanation of the different types of insulation and the pros and cons of each (very soon!), but at the current moment I’d recommend doing your own research on what will work best for you and your build.
We kept it simple, cheap, and easily accessible - we used Polysio foam board from Home Depot.
Step 7: Subfloor
We actually did this before the prior two steps, and ended up with some water damage on the new sub floor because of it. Seal those windows first before you put ANYTHING in the bus!
Installing a sub floor is not overly complex, and since it’ll be one of the first things you install, it’s often extremely satisfying. We found the easiest way to do this was to start by laying down 1x2s on the floor to create the basic support structure. The spaces between each 1x2 were filled with insulation. Then we made a template of this layer of the floor out of (very) large sheets of paper, and used that template outline our floor shape onto large pieces of 1/2” plywood (you can go thicker than this - I might’ve done 3/4” if I did this again tomorrow, but definitely don’t go thinner. This is what you’ll be screwing a lot of furniture into, it needs to be strong). Cut the plywood to shape and install over your insulation.
You could use something thicker than 1x2s and add more insulation, but keep in mind it will reduce your headroom.
Wheel wells: I handled these just like the floor - create structure around them with 1x2s, insulate between and plywood over the top.
Step 8: Furring Strips
At this point you’ll need to start adding furring strips - these are thin strips of wood that, in shuttle buses, typically get attached to the vehicle’s existing interior framing.
For those with solely fiberglass walls, you’ve drawn a bit of a short straw. With nothing to screw into this becomes a much harder job. I don’t have personal experience with this kind of structure (working on finding more information about this for you lucky few), but I do know I’ve most often seen it done using liquid nails or construction adhesive to attach the furring strips to the fiberglass, keeping the weight of eventual structures that may be attached to them in mind.
In between all of your furring strips, you’ll want to install as much insulation as you can. The more insulation the better. With all the windows your bus likely has (and knowing glass is a terrible insulator), the more places you can pack in insulation, the easier it will be to control the temperature inside your bus down the road.
Where Things Get Messy:
Up until this point a lot of conversions look the same. When the real building begins, it’s a little harder to lay out a definitive path for everyone, because not everyone wants the same features. I specifically remember trying do research about this point in the conversion process and being extremely frustrated that I couldn’t find a comprehensive plan - and now I know why. These ability to customize your conversion to your exact needs is one of its strongest suits, and as a result, no two builds are the same. Which is great as an end result, but does make getting past this point a little bit more challenging.
The rest of the steps are the order that we chose to go in, but know that it is by no means the exact path you - or anyone - has to follow. You can add, omit, and change steps to fit your own desires. There is no one-size-fits-all conversion plan, but hopefully this helps you see a path from beginning to end for yourself!
Step 9: Begin Your Systems
At this point, you’ll likely be able to start installing initial components of your systems - electrical, plumbing, and propane. Now is a good time to do things like get water tanks, pick fixture placements (shower, sink, etc), and mark where wires/pipes will need to pass through the floor or ceiling (for solar panels or water drains, for example).
We constructed our propane locker at this point, and installed our fresh water tank. We cut holes in the bus exterior for the propane locker door and water heater, and began laying out the freshwater plumbing component locations.
Step 10: Build Your Furniture & Install Your Systems
It’s almost comical to write this as a single step, because these two things together are maybe 75% of the build. But at this point, it’s truly what’s next, and the exact order of the way these things end up happening will depend on your skills, your timeline, the weather, the amount of hours you can put in per day/week, how many days in a row you can work on your bus without going crazy, etc.
If you don’t have a comprehensive floorplan at this point, it’s time to get one (floorplan guide coming soon!). Taping out where you’d like different things to be installed on the floor can be really helpful in determining how big (or small) you can tolerate different things becoming (we overhauled our shower size when we did this for the first time).
Our order of operations for this step went roughly as follows:
Install Roof Vent Fans
Build back wall separating garage & bed platform
Build bed platform
Build lower kitchen cabinets
Build closet/storage area between bed and kitchen
Run lines for and install the majority of the freshwater plumbing system & components
Start building the shower
Build microwave/storage area
Pull wires and design/install the majority of the electrical system (including solar panels)
Simultaneously design and install the rest of the propane system
Build and install upper kitchen cabinets
Build couch
Install our ceiling
Finish shower
Trust me when I say this is not a true guide - we almost certainly could have done this more efficiently, but during a build you’re constantly learning new things and changing your mind. There are a hundred different ways to go about this part of the process, and you will figure out what makes the most sense for you once you’re in the middle of it - it’s hard to know what makes sense until you’re knee-deep in it yourself.
That said, the best piece of advice I can give you for the building process is this: whatever you install, make sure you can fix it when it breaks. It sounds dumb and simple, but hear me out. If you have a bunch of electrical connections that end up behind an upper cabinet, and one of those connections gets damaged, how are you going to get in there and fix it? During our build I referred to this as accessibility, and I think it’s one of the most overlooked elements of a great build. So for example: “We can put this outlet in behind the microwave, but how can we get to it down the road if it needs servicing? Let’s make sure these drawer slides are easily removable.” And this applies to water lines, cabinet screws, propane connections, hinges, switches, you name it. You can build in almost any order so long as you have access to adjust and fix things as you go.

Mid electrical-system install - a 6-8 week project in and of itself.
Step 10: Cabinet Doors & Drawer Faces and Other Finishing Touches
These should go on as late as possible to keep them in good shape. We found it to be a lot easier to paint the doors outside of the bus and install them once they were fully finished, and we painted most of the remainder of the interior around this time as well.
We followed this rule with our countertop, too - anything that’s in the bus is liable to become a workbench, so we made sure as much work was done as possible before putting these pieces into place.
Step 11: Installing Appliances and TESTING EVERYTHING
At some point you’ll need to bring and install a lot of the remaining stand-alone items - your fridge, your showerhead, your sink faucet, your oven, etc. Again, best to hold off as long as possible to keep everything in good shape.
The one thing you want to be sure to do is test everything. Make sure your stove burners fire up, that your hot water line is actually hot, that your vent fans all turn on, that your lights work as expected. Don’t wait until you’re ready to take your first trip to come to the realization that something isn’t set up quite right. We caught a few of these issues throughout this phase and it saved us plenty of headache down the road.
Step 12: Installing the Floor
I wasn’t going to specifically talk about the floor installation until I remembered seeing someone who decided to install their floor very early on in their build, right after the subfloor. If you’re using Luxury Vinyl Planks, as people very often do, this is a very bad idea. These floors are designed to expand and contract with changing temperatures - if you put your cabinets directly on top of them and screw down into these planks, they’ll be unable to move, and you will likely have issues with your floor in the near future.
Plus, even if you’re using a different kind of flooring, your bus will be a workshop until the build is mostly done - there will be screws and nails and wood splinters on the floor, and not only should you be wearing shoes, but all of these things can cause a lot of damage to a brand new floor. Trust me, wait as long as you can. (It was our last big job, we moved in less than a week after our floor was finished).
Step 13: You’re done, can you believe it?
Well, close to it. You probably have some interior design to do, and maybe some cushions and curtains to sew. But believe me when I say that when you’ve arrived at this step, all of the hard stuff is over (I would rather make a thousand couch cushions than seal another bus window if given the choice). Rejoice in your amazing accomplishment!
Doing a shuttle bus conversion, whether simple or complex, will be one of the more challenging projects you undertake (if you’re a run-of-the-mill DIYer like me, anyways). But the absolute satisfaction of being able to look at all the hard work, all the blood, sweat, and tears that have gone into it all at the end, and know that it is truly 100% yours and yours alone, is more wonderful than I can put into words.
A cautionary step 14: A build is never truly done. It’s a lot like owning a house - there’s almost always something that needs a little bit of fixing. But ask anyone who’s purchased an RV from a factory and they’ll tell you the same. The big benefit of having done a build yourself is that you know how every component should work, which makes repairs a lot easier.
I hope this helps shed a little light on the process - this is really just scratching the surface, but it should give you an idea of what you’re in for! Best of luck with your shuttle bus conversion, I wish you all the luck and success in the world!